There are some home improvement projects that are best left to the professionals. Awning Installation Phoenix is definitely one of them.
Awnings are an easy way to shade a patio or deck and protect furniture, drapes and carpet from the sun’s harsh UV rays. But awnings can be difficult and dangerous to install.
Awnings are a great way to create shade and protect your outdoor space from the sun’s harmful rays. The first step in awning installation is to take accurate measurements of the area where you plan to mount the awning. This includes the width, height, and projection of the space. You also need to calculate the slope and clearance of the awning.
The width measurement of your awning is important because it will determine the amount of shade you get. To get the best results, make sure to measure in multiple places and double-check your measurements. Additionally, you should account for any curved areas on the patio or deck. You will need at least 9 inches of unobstructed space in the area where you want to mount your awning. If you are unsure of how to take these measurements, you can download a set of awning measuring instructions from the manufacturer’s website.
When measuring for the height of your awning, it is a good idea to consider the sun’s path at different times of day. You can use a solar path calculator to determine the ideal awning height and size for your space. In addition, you should factor in any obstacles that may impact the mounting location such as pipes, gutters, or balconies.
Finally, you need to decide how far out you want the awning to extend from the wall. The most common projection sizes range from 5 to 14 feet. If your patio or deck faces the west, you will likely need a longer projection to get adequate shade.
Once you have your measurements, you can contact a store to see what options they have for awning installation. You can also consult the manufacturer’s installation guide to find out what specific measurements you should take. Additionally, you can ask for a second opinion from a friend or family member to ensure that you have taken all of the necessary measurements.
If you are installing a permanent awning, it is likely that you will need to install mounting brackets on the soffit or fascia of your home to secure the awning. If you do not have these areas available, you can purchase beam brackets that attach to exposed wood beams to hold the awning frame.
Mark the Position
Once you have the measurements and have chosen your style of awning, it is important to mark the area on the wall where you want it to be installed. This is an easy task with a pencil or felt tip pen and the help of a level. This will be the reference line that the mounting brackets will be based on when they are being installed. It is also a good idea to check whether there are any obstacles in the area that will prevent the awning from being able to be fully extended.
This is a great time to decide whether you want an automatic or manual model. If you are in a region that experiences high winds, you will need to choose an awning material that can withstand these conditions. The sun’s direction and the view you wish to maintain will also be factors in choosing the awning location.
It is a good idea to take a look at the condition of the vinyl siding in the area where you plan on installing the awning. If there are any signs of damage, it is best to address these issues immediately before the awning installation team arrives. This will not only speed up the process, but it will ensure that your awning is safe and secure once it has been attached to the building.
If you have decided to use a motorized awning, then it is important to discuss the possibility of adding a wind sensor with your awning expert. This will allow your awning to retract in high wind or gusty weather, which will protect it from damage and keep it safer for you and your family.
Once the mounting brackets have been placed on the wall, it is time to install the awning itself. With a helper, carefully lift the awning into place above the mounting frame and make sure that it is level. Then, insert lag bolts through the awning and into the pre-drilled holes on the mounting brackets. Once the awning is secured, you can install washers and decorative caps over the lag bolts to finish the job.
Install the Mounting Brackets
Awning brackets are the unsung heroes of an awning installation, holding up your shade structure and keeping it securely attached to your home. Depending on the type and size of awning you purchase, you may need several different types of brackets to secure it. Read the instructions that came with your awning for specific details on what kind of screws and drill bit to use. Before you drill the holes, use a straight line and a level to make sure that the marks you made for the brackets will line up properly.
Once you’ve marked the position of the awning brackets on the wall, use a pencil or a felt tip pen to mark the location and draw a reference line. This will be the line you’ll use to screw in the awning brackets. Make sure that the reference line is straight and aligned with the bottom edge of the awning frame.
You’ll also need to choose a location for the awning brackets that’s free of obstructions. You’ll want to ensure that you can install the awning without interfering with any load-bearing structural components of your house, such as exterior lights, exhaust vents, or gutters. The awning should also be situated away from any windows or doors, and you’ll need to make sure that the awning will be able to retract when you’re not using it.
Before you start drilling, it’s important to know if your vinyl siding can handle the weight of an awning and the fasteners used to install it. You should check the siding to see if there are any cracks or chips. If there are any, you should consider repairing them with silicone caulk to prevent water damage.
When you’re ready to drill, be sure to use a long, high-quality drill bit to make it easier to reach the wall studs. It’s also a good idea to wear safety goggles and a dust mask for protection against any flying debris.
Once you’ve finished drilling, you can install the awning brackets. Make sure that you don’t over-tighten the screws or bolts, and that they are all tightened evenly. Once the awning is installed, you can test it by manually opening and closing it or using a remote control to activate the retraction system.
Install the Awning
Adding an awning to a door, window or outdoor living space adds a welcoming feature and creates a shaded area where people can relax, read, eat or enjoy the weather. They can also help to control the amount of sun, light and wind that enters a home or building and they can reduce heating and cooling costs.
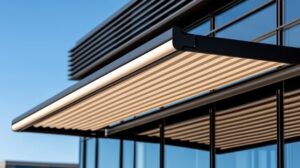
Awnings come in a variety of styles and colours to suit different tastes and architecture. For instance, strong metal structures often complement contemporary style homes while fabric solutions are more at home with older or traditional style houses. They are also available in a range of projections, from small to large, to match any space.
When installing an awning, it’s important to follow the instructions that came with it as well as the specific requirements of the model you purchased. The first step is to prepare the mounting surface by ensuring that it’s free from dirt, debris and moisture. The awning must also be properly secured to the mounting brackets and it’s generally recommended that a second person be present to help lift the awning into place.
Some awnings offer the option of changing the pitch, which is the angle at which it extends from the wall. This allows you to adjust the canopy as the sun moves across the sky at different times of day. This is particularly useful for homeowners in areas that experience extreme weather conditions like high winds or frequent rain.
Once the awning has been installed, it’s important to periodically inspect it for wear and tear. Look for rips, holes, fraying, mould and mildew. It’s also a good idea to clean the awning regularly using warm water and a gentle soap. Inspect the hardware and lubricate any moving parts as instructed by the manufacturer.
Installing an awning is an easy do-it-yourself project for any homeowner who’s comfortable working on a ladder and making alterations to their property. It’s also an ideal way for renters or homeowners to improve the appearance of a home without spending money on a major renovation.